
How do I ink blend? What tools do I need? What colors go well together? Why can't I get good coverage? All valid questions when you're trying to incorporate ink blending into your crafting.
Get answers to all your top ink blending questions and more in this helpful guide. We'll showcase what brushes and tools you need to make the best blends, including innovative new blending tools as well as some crowd favorites!
And don't miss our quickstart guide at the end for top tricks, tips, techniques, and tools for ink blending like a pro!
Blending Tools
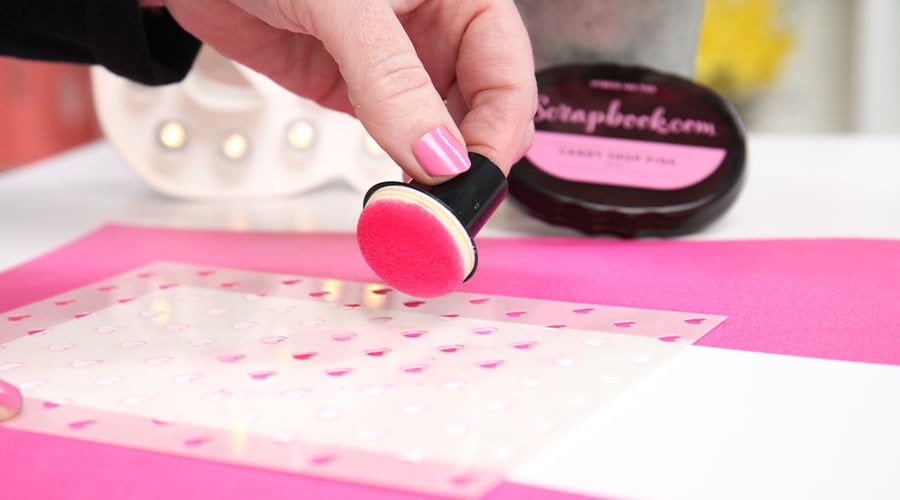
Scrapbook.com Ink Blending Tool With Domed Foam Applicators
Speaking of things you can't live without, Scrapbook.com took years to develop an awesome tool to help every crafter become an expert ink blender and artist! We combined the helpfulness of a handled blending tool with the revolutionary domed shape of a craft dauber for a whole new world of ink blending!
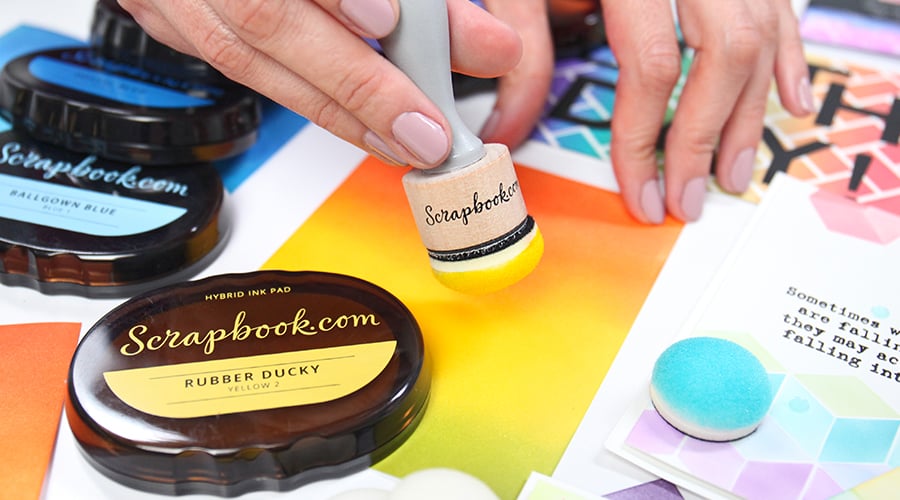 If you are looking for an easy introductory tool to ink blending or a way to upgrade your blending game, this is the tool for you. The extra thick domed foam allows for no-line blending and easy stenciling as well. The thickness of the foam allows for superior ink absorption and distribution on your project every single time.
You can also save the inked applicators for each of your colors or give them a gentle rinse to use again later.
Scrapbook.com Wide Blender and Scraper Craft Tool with Felt
Scrapbook.com has once again revolutionized ink blending! Introducing the Scrapbook.com Wide Blender Tool! This handy tool with an arched ergonomic handle and felt pad makes it so easy to blend ink into rainbows, stripes, and more!
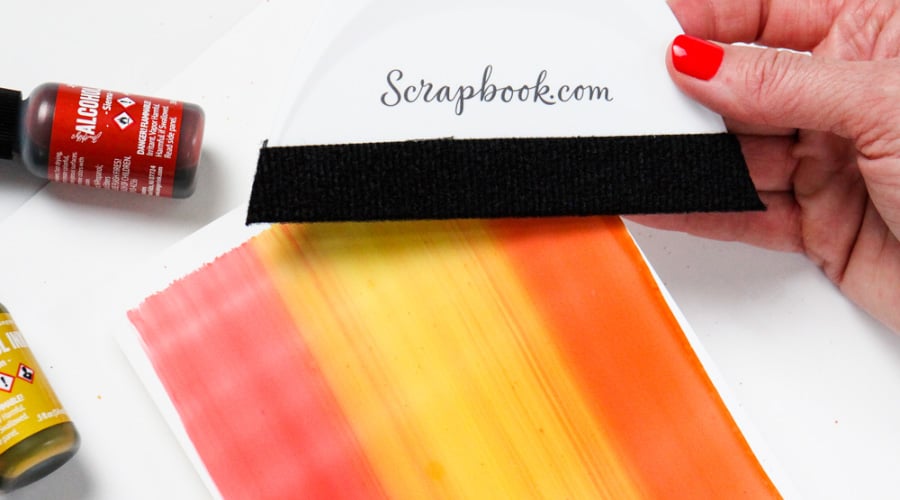 This new blender tool works well with alcohol inks and Yupo paper - but also works with regular inks, paints, and other media on cardstock and other papers. The felt pad can be washed and replaced, so when you want to change up your rainbow, wash with a little bit of dish soap and rinse well - or remove the felt pad completely and replace it with a fresh new one.
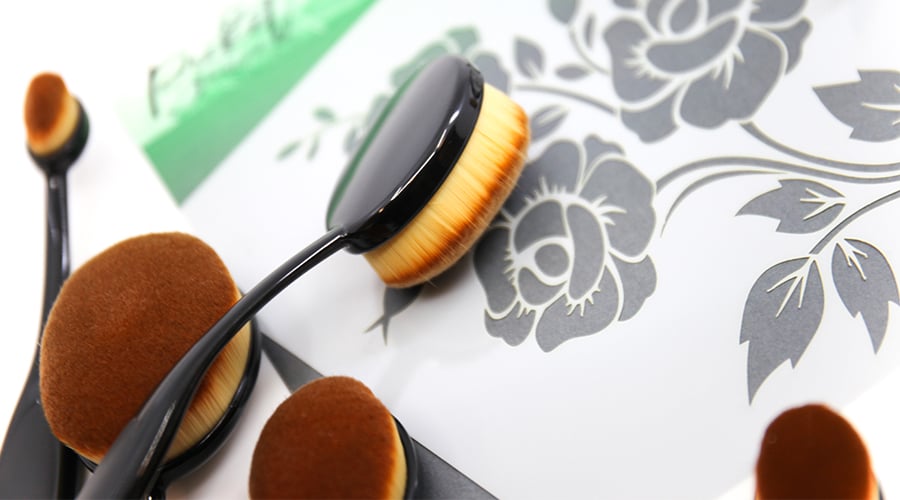
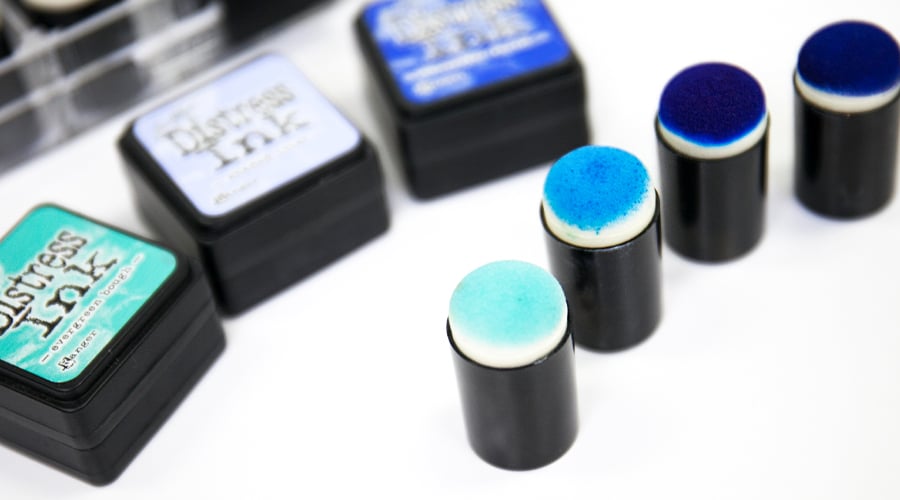
Tim Holtz - Mini Ink Blending Tool
They've been used for over half a decade on countless crafting projects and are beloved by many scrapbookers, card makers, mixed media artists, journalers, and more. We're, of course, talking about the Tim Holtz Mini Ink Blending Tool by Ranger Ink. Distress your paper, create a background, evenly apply paints, blend inks, and so much more, all with this one little tool.
With a smooth comfortable handle and versatile replacement blending foams, this tool can be found in most crafters' stashes. The Mini Ink Blending Foams attach with a simple hook and loop material and quickly get to work on blending your inks. Since they are thin and disc-like, the foams absorb ink quickly, so you can get good saturation and ink transfer for super colorful looks.
They are also really handy to store beneath your Distress Ink Minis or Distress Oxide ink pads for continued use. That way, you always know what color foam goes with each ink!
What Inks Are Best For Ink Blending?
As much as we love ALL inks (they're just so pretty!), some are far better than others for ink blending. Choosing the right ink is more than half the battle for successful ink blending.
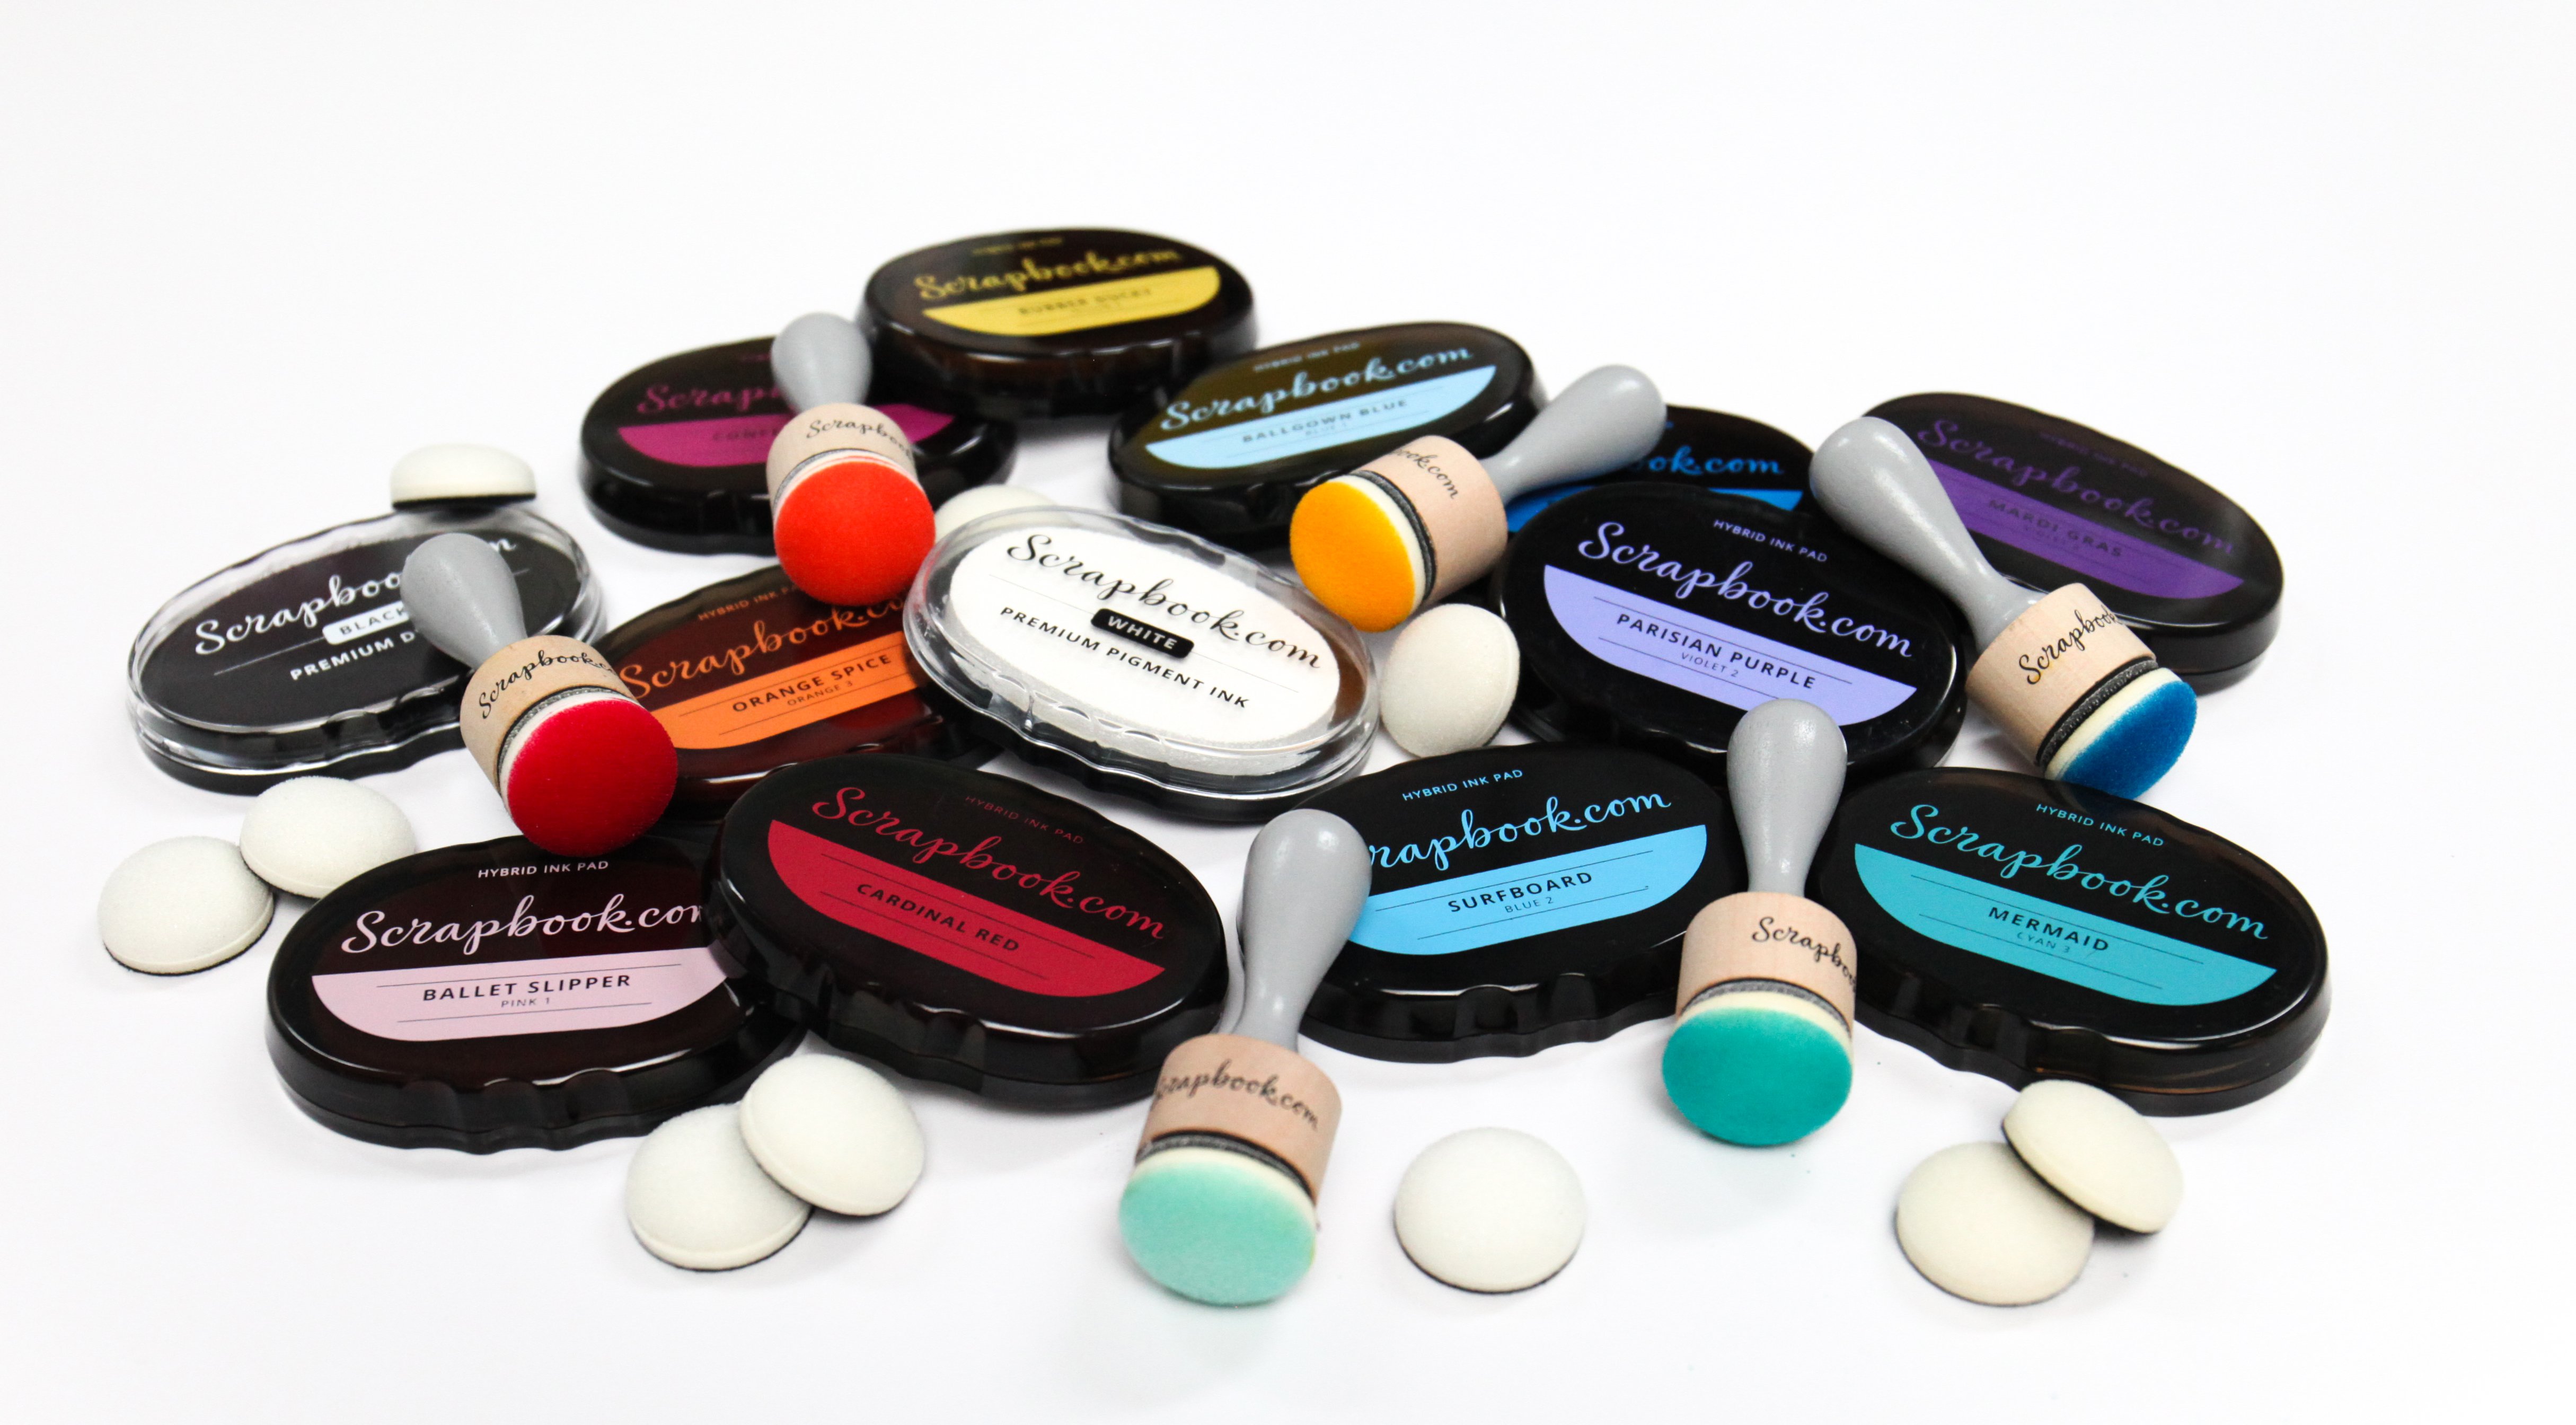
Dye inks are a top choice for ink blending artists. They are classic, affordable, and made by some of your favorite brands like Catherine Pooler, Tim Holtz, Simon Hurley, and Lawn Fawn. They are best for white or light-colored cardstocks since the inks sink into the paper as they blend.
Distress Oxides by Tim Holtz might be the gold standard in ink blending due to their unique properties. As a combination of water-reactive dye ink and pigment ink, these inks are creamy, dense, and blend like it's their job!
They also work wonders on dark or colorful cardstocks since the ink sits on top of the page as opposed to sinking into it.
Scrapbook.com's extensive collection of Hybrid Inks also make a beautiful choice for ink blending - especially when paired with our Domed Foam Ink Blending Tool.
Since these colorful hues are designed in color families, it makes them ideal for seamless blends and delicate color progression. Each color family of hybrid inks has four individual colors numbered 1 through 4 (1 being the lightest shade in the group and 4 being the darkest). If you want the coolest ombre effect you've ever seen, pick up a 4-pack color family.
Nuvo Blending Dauber Tools
Like their stencil brushes, Nuvo's Blending Daubers and replacement pads have a lightweight, curved handheld design that makes endless hours of crafting a breeze.
Their unique design looks like a small pillar and has a similar hook and loop attachment on the end for blending foam pads.
The column design of the tool allows you to designate where you hold the tool and how much pressure you apply. Hold it close to the foam for more concentrated ink placement and pressure or further towards the end for softer, more delicate swirls of color.
Ranger Ink - Detail Blending Tools
At first glance, these tiny little sticks may not look like much, but you'd be surprised how much they come in handy when working on small, detailed projects.
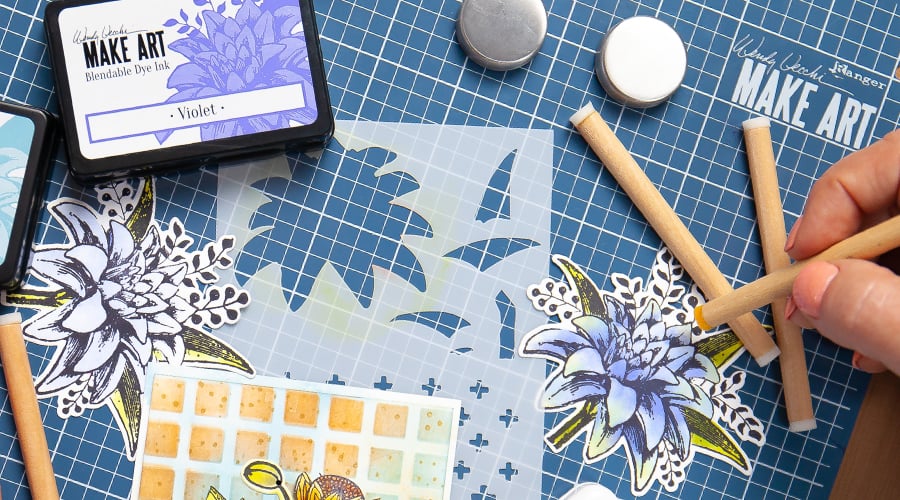 The Detail Blending Tools from Ranger are a favorite of Wendy Vecchi for adding some of the smallest color accents, blended details, and important little bits of color to finish off a project. You'll quickly find that this is a tiny little tool you can't live without in your craft room.
Another very helpful, handy little pack of brushes for detail work comes from Altenew. Where Ranger's are foam-tipped, these ones are tiny, compact bristles. Choose from 3 different sizes in this 3-pack of Detailed Blending Brushes for intricate stencils, effects, and so much more.
What's The Best Paper to Ink Blend On?
Too many times we've heard people say that they just aren't good at ink blending. Everyone can be a star ink blender as long as you start with the right paper!
The key to fabulous ink blending starts with a super smooth cardstock. Textured paper just doesn't permit the ink to move freely and blend into the other colors. Pick something incredibly smooth that allows movement - and that doesn't always mean it has to be white!
Another key thing to look out for when choosing your ink blending paper is its thickness. If your smooth cardstock is too thin, the ink will saturate it too quickly and start to bend, crease, crinkle, or become incredibly difficult to work with.
Our 80lb Neenah Solar White Cardstock is an excellent smooth, sturdy paper for ink blending!
Blending Brushes
Stencil Blending Brushes
If you want something big and bold for getting creative, large-handled Stencil Blending Brushes might be the tool for you.
With a long handle and full, soft, synthetic bristles, stenciling and blending have never been softer!
Nuvo has a 4-pack set of various sizes that come in a really trendy deep slate gray. They almost look too pretty to use with their silvery bristles that have snow-white tips. The variety of sizes lets you alternate which one you're using based on the size and look of your project.
These brushes can also be used for more than just inks. You can use them for dusting powders, getting fun washed effects with water-based mediums, and beautiful brush strokes with pastes and mousse.
Tim Holtz - Distress Blending Brushes
With stiff, rough bristles, the Tim Holtz Distress Blending Brushes are versatile, handy little tools with a variety of uses. Since each of the natural fiber bristles is thick and individualized, this brush picks up and distributes mediums in a unique way. These bristled brushes achieve soft, delicate results and are especially handy when swirling gently with intricately-designed stencils.
Depending on how rough you "pounce" your ink upon the paper, you can achieve rough, variegated looks and distressed, scratchy-looking lines.
One of the unique functions of the Tim Holtz Blending Brush is the casing in which the bristled brush is enclosed in. The metal tube has a telescoping function that allows the bristles to spread out in a full brush format or tighten to give more application control in a smaller area. It's almost like two tools in one!
What Craft Mat Should I Use For Ink Blending?
There are a variety of different work surfaces that crafters can choose from for working on projects and protecting their desk or table.
For a work surface that's full of class, stick with Tim Holtz and his mats made of glass! The Tim Holtz Glass Media Mat by Tonic Studios is beloved by crafters everywhere for its versatility. Available in full size and super-handy travel versions, the slick tempered glass allows for fluid movement of not just inks, but a variety of paints, pastes, and more!
An oldie-but-goodie is the 5-star rated Non Stick Craft Sheet by Ranger. Its slick, non-porous surface makes it ideal for dabbing off excess ink and ensuring even coverage when swished and swirled onto your cardstock.
Whichever mat you choose and use, it's important to have a surface that allows you to dab or blot some of your inks to achieve soft, no-line results. Going from ink pad to paper may result in overly saturated inky areas without the proper tap-off technique!
Using a mat or sheet also allows you to pick up the dabbed off ink for later blending strokes in a fabulous no-waste approach to ink blending.
Nuvo - Blending Brushes
Nuvo and Tonic Studios have a few blending brush options that are similar in design. Closely resembling brushes you may see at a barber or men's shave shop for applying shaving cream, this handy little three-pack with light, ergonomic handles are ready for a world of applications.
Picket Fence Studios - Life Changing Blender Brushes
Are you ready to have your crafting life changed? Then you need to try the Picket Fence Studios Life Changing Blender Brushes. The name truly says it all, but we'll go into a bit more detail. These make-up style brushes are comprised of thousands of super-soft bristles that are all tightly packed together into the head of the brush.
 The stiff compilation of the delicate bristles makes these an absolute wonder for blending multiple mediums, ink included. They ensure a truly delicate application of ink while swirling and blending colors together with so much ease you'll be in awe!
Not sure if these are for you? Picket Fence also has a fun little sampler pack that includes just two of their brushes for you to take a spin with!
Paper Rose - Blending Brushes
Ready to see what blending brushes are all about? Paper Rose has a must-have single pack at an unbelievably affordable price for you to try out and see if you like it!
Large Blending Brushes
Do you have a bigger project you're working on? Say, something with a 12 x 12 stencil? Or maybe you have limited mobility or grip strength in your hands. A few brands have released large, palm-sized blending brushes that are easier to hold and cover a whole lot more surface area. Altenew has a bright white 5-star rated version, and Nuvo has a natural-colored version.
How Do You Clean Blending Brushes?
Stencil brushes and blending brushes have beautiful, clean bristles when they're fresh out of the package. Sometimes they just look far too pretty all spiffy and clean to get ink, paste, mousse and other mediums on. But, let's face it, we want to play with them!
When using dye-based inks or pigment inks, most of the coloring easily washes out of your bristles with a little gentle soap and water.
If using hybrid ink, the bristles of your brushes may stain. That's totally normal! Many people (even Tim Holtz himself!) designate one blending brush per color family of ink and then just give them a good wipe down in between uses with a baby wipe or microfiber cloth.
Craft Sponge Daubers
Scrapbook.com Exclusive Craft Daubers
Years ago, crafters everywhere were getting inky with make-up sponges, cotton balls, cotton swabs, and all manner of other household items. That is until sponge daubers came along.
These amazing little affordable tools have been creating unbelievable projects with inks, chalks, stains, and more for quite some time. They are versatile, reliable, and a fabulous way to enter the world of inking and blending.
 For those who get excited about the perfect storage and organization, Scrapbook.com also has an exclusive Sponge Dauber Storage Box that holds up to 40 individual craft daubers at once. So no matter how many inks you have or mediums you use, you can have a dedicated, perfectly stored dauber for that!
Scrapbook.com Jumbo Sponge Dauber
When you have a great thing, what do you do? Make it BIGGER! Scrapbook.com took your love of Craft Daubers and supersized it into a Jumbo Sponge Dauber.
 It has all the benefits of the original sponge daubers with durability and versatility, but it works even better on larger-scale projects. For crafters with limited mobility in their hands, this jumbo little tool is also easier to hold too!
What Are The Best Ink Blending Techniques?
One important aspect of ink blending is knowing which colors go together and which ones don't. The more you play around with ink blending, the more you will figure this out (while also improving your blending skills!).
Blending red and blue makes purple. Blending red and yellow makes orange. Blending red and green makes brown. To avoid blending your beautiful tones into muddy brown, turn to the color wheel or just experiment a little at a time.
Ink Blended Rainbow: To blend a fabulous rainbow, you actually only need a few primary colors since ink blending will naturally create your ROYGBIV rainbow. Start with red, then yellow, then blue. Blending each of these one after the other will develop into a seamless red, orange, yellow, green, and blue. Finish off with a red/blue blend into a fierce violet purple and your rainbow is complete!
Ink Blended Sunset: For a romantic setting sun, try using a Distress Ink palette of Mustard Seed yellow into Picked Raspberry pink, followed by Seedless Preserves purple, and maybe just a hint of Black Soot as the darkest part of night arrives on your scene.
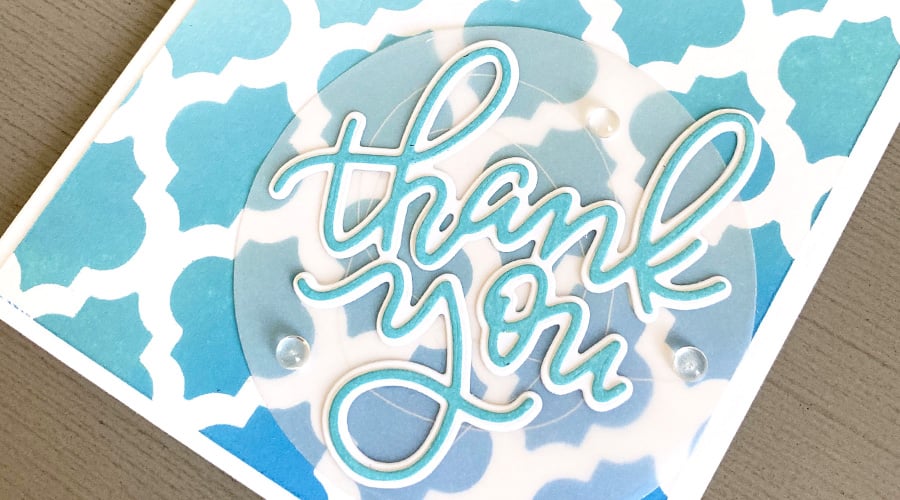
Ombre Effects: The ombre look is when one main colors progresses from light to dark across your project or card. To achieve this look, pick out 2 or 3 colors from the same family. If you're working with Distress Oxides, you could start with Tumbled Glass blue, progress to Broken China blue, and finish with Salty Ocean blue.
Top Tips For Ink Blending - The Quickstart Guide
- Choose the right tool. For softer looks, go with a blending brush or stencil brush with bristles; for a darker saturation of ink and more coverage, choose a foam applicator blending tool.
- Pick the right paper. Blending is best on nice, thick, smooth cardstock. You can choose light, dark, or colorful paper, but make sure it's smooth to move the ink into the various colors of your blend.
- Use the right inks. Dye inks typically take longer to dry and will blend well together as they absorb into your paper. Distress Oxides are designed to be blendable with their creamy, fusion properties that sit on top of your paper as you blend. You can also get hybrid inks to blend, but they are not the ideal choice.
- Begin in the right place. Start your blend off the paper (on your craft sheet or mat) and slowly work your way onto your project. This will ensure even ink coverage and fewer dark streaks. And you can pick up the ink left on your craft sheet to redistribute on your project - no wasted ink!
- Start slow. You can always add more ink, but you can't take it away! Begin your blend with a light layer of ink and gradually add more layers if you want darker results.
- Find the right colors. Don't use your pretty inks to make mud! Reds, oranges, pinks, and yellows go together. Blues, greens, and yellows go together. Use the color wheel to find which colors will blend well.
- Don't smudge. You might not mind getting inky fingers, but you certainly don't want inky fingerprints ruining your blends! Use a spare piece of cardstock or even a soft microfiber rag to guard your fingers against making unintentional inky marks on your project.
- Play around. The only way you can master ink blending is by blending ink! So make sure you give yourself permission to play with your inks and blending skills to see what works, what doesn't, and what the best techniques and tools are for YOU!
For some hands-on advice about blending tools and brushes, be sure to check out our Ultimate Ink Blending Tool and Brush Comparison video right here:
What is your favorite tool for ink blending? What beneficial advice do you have for fellow crafters in the great big world of ink blending? Be sure to comment below!
For more on inks and ink blending, the following articles are on our must-read list:
Why You Need Domed Foam For Ink Blending
5 Secrets to Blending Distress Ink
Everything You Need to Know Before You Buy Distress Inks and Oxides


